“People buy with their eyes.” It is a well-known saying in the e-commerce world. According to research by BigCommerce, 75% of online shoppers consider the quality of product photos to be the deciding factor in their purchase. In a physical store, a customer can touch a product, but in your webshop, your photos are the only ‘tangible’ experience.
Fortunately, with the right techniques and a good phone (or camera), you can get a long way. In this blog, we share 3 tips for taking good product photos.
Tip #1: Control the light
Light is the most important thing for a good photo. As an entrepreneur, natural daylight is the best (and cheapest) to use for your product photos.
- Use a (large) window for daylight: You don’t need studio lights if you harness the power of natural light. You don’t have to wait until the sun is shining brightly, as this creates deep shadows. Instead, choose a slightly cloudy day, so that the light is distributed evenly over your product.
- Troubled by shadows? Then take a piece of white cardboard or some aluminum foil and place it on the dark side. This ensures that the light is reflected and fills in the shadows.
- Use a single light source: do not mix daylight with artificial light. This prevents color variations and ensures that all your product photos have the same professional look.
Tip #2: The Power of Composition
A cluttered background causes customers to lose interest quickly. You want to ensure that all attention goes to the product.
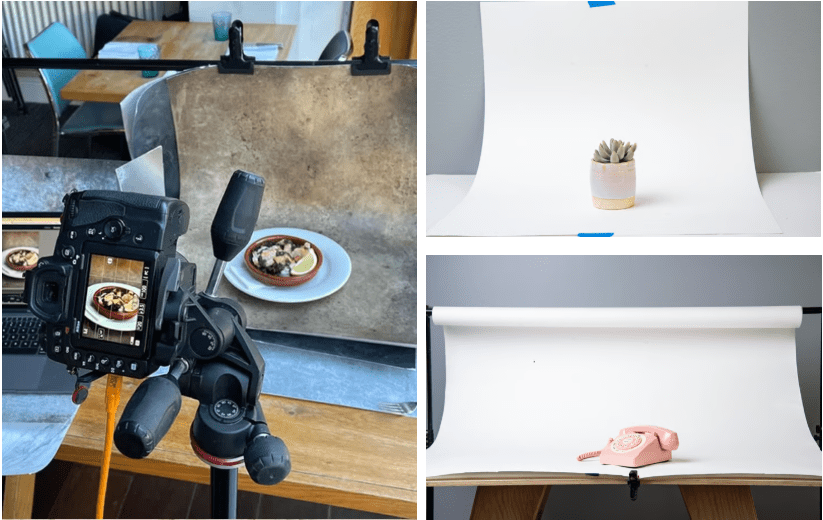
The infinity Curve
Do you want a super sleek background? Then create an infinity curve yourself . You do this by taking a large white sheet of paper and taping it to the top of your wall. Let the rest run across the table in a gentle curve. This causes the horizon line in your photo to disappear, making your background appear endless.
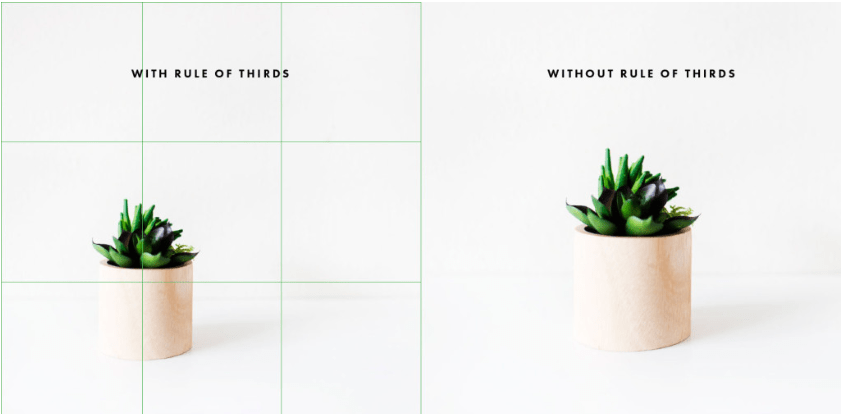
The Rule of Thirds
Don’t always place your product exactly in the center. Use the grid on your phone. According to
the Rule of Thirds , a photo looks more interesting if the subject is positioned at one of the intersections of the lines.
Make clear how big your product is
A common reason for returns is that a product is often larger or smaller than expected. Therefore, always include a photo of the product in use. Photograph it next to an everyday object so the customer immediately sees its size.
3. Post-processing and Optimization
A good product photo is only truly complete after the finishing touch, but pay attention, because post-processing is different from using filters! It is important that you adjust/check the following things:
- The brightness of your photo: focus on increasing the exposure and contrast. Do not use filters, only these two functions!
- File size vs. speed: the speed at which your images load is crucial. Large images (5+ MB) slow down your website. Use tools like TinyPNG to reduce the size of your photos without loss of quality.
- SEO optimization: As soon as you upload your photos to JouwWeb, give them a name, for example handmade-leather-jacket-brown.png
Get started!
Product photography is easier than you think! Take your time, experiment with different angles and spaces, and take a close look at what your competitors are doing. With these 3 tips, you can at least lay a good foundation for a webshop that looks great!